Tutorial Part 1: The Basics
In this tutorial, you'll make this diagram of the four terrestrial planets:
import "./styles.css";

document.getElementById("app").innerHTML = `
<h1>Hello world</h1>
`;
This tutorial doesn't assume you know anything about Bluefish or UI frameworks. Along the way we'll encounter marks, relations, and declarative references.
Tutorial setup
Click "Open Sandbox" in the bottom right corner to open the editor in a new tab using the website CodeSandbox. If that doesn't work, you can also open this tutorial in a new tab and work in this editor directly.
INFO
You may see an error like
Argument of type 'HTMLElement | null' is not assignable to parameter of type 'MountableElement'. Type 'null' is not assignable to type 'MountableElement'.typescript(2345)
This is expected and won't affect your ability to follow the tutorial. If you want to fix it, replace the last line of code with render(Diagram, document.getElementById("app")!);
(Notice the ! towards the end.)
import "./styles.css";

document.getElementById("app").innerHTML = `
<h1>Hello world</h1>
`;
A look at the starter code
There are a bunch of files in the sandbox, but the one to pay attention to is index.ts. This is where our spec lives. Let's walk through the file line by line.
Import Bluefish
// prettier-ignore
import { Group, StackH, StackV, Circle, Text, Ref, Background, Arrow, Align, Distribute, Rect, render } from "bluefish-js";

function Diagram() {
  return Circle({ r: 15, fill: "#EBE3CF", "stroke-width": 3, stroke: "black" });
}

render(Diagram, document.getElementById("app"));We first import all the components we'll need from the Bluefish package, which is called bluefish-js.
INFO
We use // prettier-ignore to tell the linter to ignore the next line of code. We're doing this to prevent the linter from complaining about the import statement being too long and reformatting it.
Export Default Function
// prettier-ignore
import { Group, StackH, StackV, Circle, Text, Ref, Background, Arrow, Align, Distribute, Rect, render } from "bluefish-js";

function Diagram() {
  return Circle({ r: 15, fill: "#EBE3CF", "stroke-width": 3, stroke: "black" });
}

render(Diagram, document.getElementById("app"));This defines a function called Diagram that will return our diagram when it's called.
The Circle mark
// prettier-ignore
import { Group, StackH, StackV, Circle, Text, Ref, Background, Arrow, Align, Distribute, Rect, render } from "bluefish-js";

function Diagram() {
  return Circle({ r: 15, fill: "#EBE3CF", "stroke-width": 3, stroke: "black" });
}

render(Diagram, document.getElementById("app"));Right now our diagram consists of a single Circle mark. A mark draws a primitive object (like a circle or a piece of text) on the screen.
We give arguments to the Circle element, called props, as a JavaScript object.
NOTE
Marks in Bluefish are similar to SVG primitives, not marks in charting libraries. They only draw a single element.
render
// prettier-ignore
import { Group, StackH, StackV, Circle, Text, Ref, Background, Arrow, Align, Distribute, Rect, render } from "bluefish-js";

function Diagram() {
  return Circle({ r: 15, fill: "#EBE3CF", "stroke-width": 3, stroke: "black" });
}

render(Diagram, document.getElementById("app"));The render function takes two arguments: a function that returns our diagram, and an HTML element to render the diagram to. The render function inserts our diagram into the DOM element we pass in.
Build the row of planets
Right now we just have one circle. To make more, we can just copy-paste the Circle mark a few times with different sizes and fills, and put them in a Group:
// prettier-ignore
import { Group, StackH, StackV, Circle, Text, Ref, Background, Arrow, Align, Distribute, Rect, render } from "bluefish-js";

function Diagram() {
  return /* [!code ++] */ Group([
    Circle({ r: 15, fill: "#EBE3CF", "stroke-width": 3, stroke: "black" }),
    Circle({ r: 36, fill: "#DC933C", "stroke-width": 3, stroke: "black" }),
    Circle({ r: 38, fill: "#179DD7", "stroke-width": 3, stroke: "black" }),
    Circle({ r: 21, fill: "#F1CF8E", "stroke-width": 3, stroke: "black" }),
  ]);
}

render(Diagram, document.getElementById("app"));But they're drawn on top of each other!
That's because Group just renders all its children. It doesn't do any fancy layout. If a child's position or size fields aren't otherwise constrained, Group will default those fields to 0.
NOTE
When we pass multiple children to a relation, we pass them as an array.
Create a row using the StackH relation
To fix this, we can replace our Group with the StackH relation. This relation places its children in a horizontal row. A relation visually arranges its child elements.
// prettier-ignore
import { Group, StackH, StackV, Circle, Text, Ref, Background, Arrow, Align, Distribute, Rect, render } from "bluefish-js";

function Diagram() {
  return /* [!code --] */ Group([
  return /* [!code ++] */ StackH(
    { spacing: 50 },
    [
      Circle({ r: 15, fill: "#EBE3CF", "stroke-width": 3, stroke: "black" }),
      Circle({ r: 36, fill: "#DC933C", "stroke-width": 3, stroke: "black" }),
      Circle({ r: 38, fill: "#179DD7", "stroke-width": 3, stroke: "black" }),
      Circle({ r: 21, fill: "#F1CF8E", "stroke-width": 3, stroke: "black" }),
    ]
  );
}

render(Diagram, document.getElementById("app"));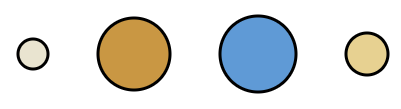
This StackH relation horizontally stacks its children 50 pixels apart from each other and vertically centers them.
Nest StackH in a Background relation
Next we'll put a background around the planets. To do so, we'll use the Background relation.
// prettier-ignore
import { Group, StackH, StackV, Circle, Text, Ref, Background, Arrow, Align, Distribute, Rect, render } from "bluefish-js";

function Diagram() {
  return /* [!code ++] */ Background(
      { padding: 40, fill: "#859fc9", stroke: "none" },
      StackH({ spacing: 50 }, [
        Circle({ r: 15, fill: "#EBE3CF", "stroke-width": 3, stroke: "black" }),
        Circle({ r: 36, fill: "#DC933C", "stroke-width": 3, stroke: "black" }),
        Circle({ r: 38, fill: "#179DD7", "stroke-width": 3, stroke: "black" }),
        Circle({ r: 21, fill: "#F1CF8E", "stroke-width": 3, stroke: "black" }),
      ]),
    );
}

render(Diagram, document.getElementById("app"));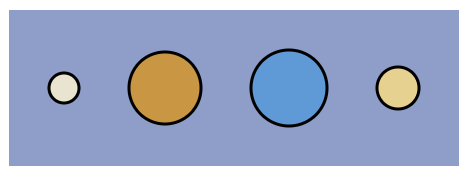
We've given this Background relation 40px of padding on each side and specified fill and stroke colors.
Add a label
Now that we've created a horizontal row of the planets, let's add a label to one of them.
Overlap relations with Ref
We first want our diagram to look like this:
Let's first describe our addition to the diagram in words. We've vertically stacked a piece of text above the Mercury circle. We can then annotate this with all the marks and relations we're using:
We've (i) vertically stacked a piece of (ii) text above the (iii) Mercury circle.
And now we can translate this description into Bluefish code!
// prettier-ignore
import { Group, StackH, StackV, Circle, Text, Ref, Background, Arrow, Align, Distribute, Rect, render } from "bluefish-js";

function Diagram() {
  return [
    Background(
      { padding: 40, fill: "#859fc9", stroke: "none" },
      StackH(
        { spacing: 50 },
        Circle({ r: 15, fill: "#EBE3CF", "stroke-width": 3, stroke: "black" }),
        Circle({ name: "mercury", r: 15, fill: "#EBE3CF", "stroke-width": 3, stroke: "black" }),
        Circle({ r: 36, fill: "#DC933C", "stroke-width": 3, stroke: "black" }),
        Circle({ r: 38, fill: "#179DD7", "stroke-width": 3, stroke: "black" }),
        Circle({ r: 21, fill: "#F1CF8E", "stroke-width": 3, stroke: "black" })
      )
    ),
    StackV({ spacing: 30 }, [
      Text("Mercury"),
      Ref({ select: "mercury" }),
    ]),
  ];
}

render(Diagram, document.getElementById("app"));We've (i) added a StackV relation (similar to StackH) to vertically stack the text and circle. This relation contains (ii) a Text mark and (iii) a Ref element that selects the Mercury circle.
Let's walk through this carefully. First we give the Mercury circle a name so we can refer to it later:
Circle({ r: 15, fill: "#EBE3CF", "stroke-width": 3, stroke: "black" }),
Circle({ name: "mercury", r: 15, fill: "#EBE3CF", "stroke-width": 3, stroke: "black" }), Then we create a vertical stack:
StackV({ spacing: 30 }, ...)And place a text mark above the Mercury circle:
StackV({ spacing: 30 }, [Text("Mercury"), Ref({ select: "mercury" })]);A Ref creates a declarative reference. This reference is a pointer to an existing element in our diagram. A relation (e.g., StackV) can read and write the size and position of an element through a Ref.
Ref's are declarative, because they cannot override properties that have already been set. For example, notice that StackV does not break the Mercury circle's relationship to the other planets that StackH already defined.
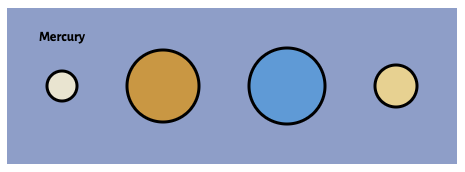
Put a Background behind the planet and the label
Finally, we can place a Background relation behind the label just as we did with the Background behind the planets.
// prettier-ignore
import { Group, StackH, StackV, Circle, Text, Ref, Background, Arrow, Align, Distribute, Rect, render } from "bluefish-js";

function Diagram() {
  return [
    Background(
      { padding: 40, fill: "#859fc9", stroke: "none" },
      StackH({ spacing: 50 }, [
        Circle({ name: "mercury", r: 15, fill: "#EBE3CF", "stroke-width": 3, stroke: "black" }),
        Circle({ r: 36, fill: "#DC933C", "stroke-width": 3, stroke: "black" }),
        Circle({ r: 38, fill: "#179DD7", "stroke-width": 3, stroke: "black" }),
        Circle({ r: 21, fill: "#F1CF8E", "stroke-width": 3, stroke: "black" }),
      ])
    ),
    /* [!code ++] */ Background(
      { rx: 10 },
      StackV({ spacing: 30 }, [Text("Mercury"), Ref({ select: "mercury" })])
    ),
  ];
}

render(Diagram, document.getElementById("app"));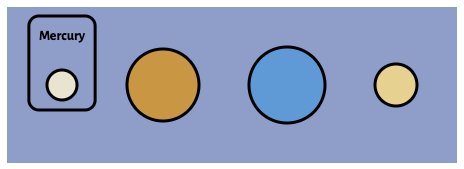
Wrapping up
Tada! We've completed our first Bluefish diagram. Along the way we encountered some Bluefish marks (Circle and Text), some Bluefish relations (StackH, StackV, and Background), and declarative references (Ref) for referring to existing elements.
Here's what the finished code should look like:
import "./styles.css";

document.getElementById("app").innerHTML = `
<h1>Hello world</h1>
`;
If you want to explore more, try playing around with spacing and padding, or swapping StackH and StackV.